Skip to content

Cart

Your cart is empty

Image
Image
Image

Product description

This self-adhesive patch kit lets you easily and quickly repair punctures so you can carry on enjoying your bike rides.

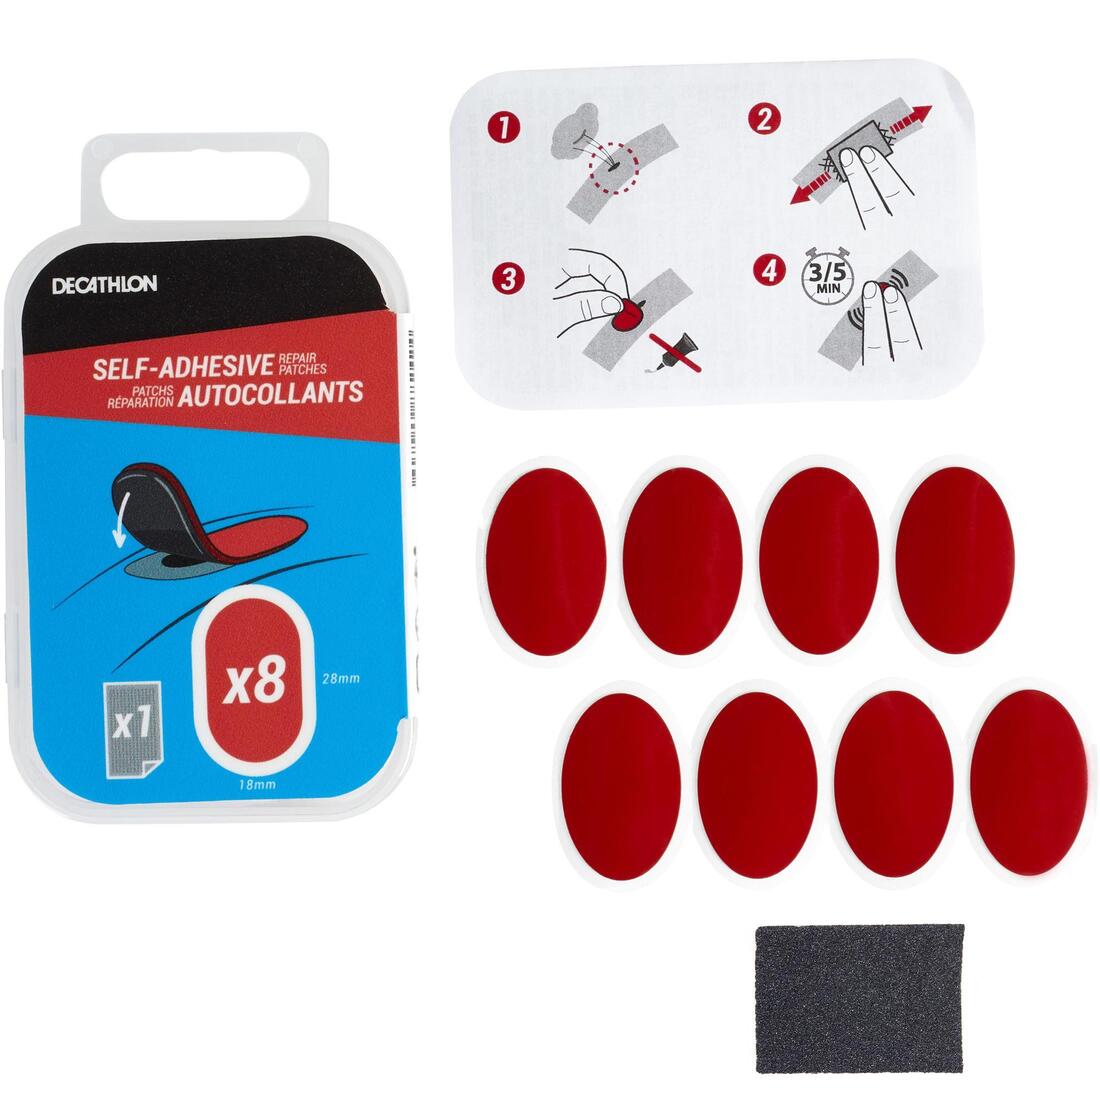
8 self-adhesive patches for repairing punctures without vulcanising solution.

Compatibility

100% effective on all types of Butyl inner tubes.

Ease of use

Less restrictive and just as effective as a classic patch.

Easy assembly / dismantling

Easy to stick on and quick to use.

DECATHLON

Self-Adhesive Patch Inner Tube Repair Kit

Sale priceLBP435,000.00

Size Guide

MEN SIZE GUIDE 


How to measure:

  • Head size: Wrap a tape measure horizontally around your head just below your eyebrows.
  • Chest size: Wrap a tape measure horizontally around the widest part of your chest.
  • Waist size: Wrap a tape measure horizontally around the widest part of your waist.
  • Hand size: Wrap a tape measure horizontally around your hand, starting from your thumb.
  • Shoe size: Place your heels flush against a wall. Place a heavy object (such as a book) against your toes. Measure the distance between the wall and the object.

TOPS (T-SHIRT, PULLOVER, JACKET)
 Size XS S M L XL 2XL 3XL 4XL
Chest (cm) 84-87 88-91 92-95 96-103 104-113 114-123 124-135 136-146


BOTTOMS (SHORTS, PANTS, BOARDSHORTS)
 Size XS S M L XL 2XL 3XL
Hips (cm) 84-86  87-91  92-97 98-104 105-111 112-118 119-126


SWIMWEAR
 Size S M M-L L L-XL XL XL-2XL 2XL
Hips (cm) 84-87 88-91 92-95 96-103 104-113 114-123 124-135 136-146


WOMEN SIZE GUIDE


How to measure:

  • Head size: Wrap a tape measure horizontally around your head just above your eyebrows.
  • Chest size: Wrap a tape measure horizontally around the widest part of your chest.
  • Band size: Wrap a tape measure horizontally around your torso just below your breasts.
  • Waist size: Wrap a tape measure horizontally around the widest part of your waist.
  • Hip size: Wrap a tape measure horizontally around the largest part of your hips.
  • Hand size: Wrap a tape measure horizontally around your hand, starting from your thumb.
  • Shoe size: Place your heels flush against a wall. Place a heavy object (such as a book) against your toes. Measure the distance between the wall and the object.
    TOPS (T-SHIRT, PULLOVER, JACKET)
    Size 3XS 2XS XS S M M-L L L-XL XL XL-2XL 2XL
    Chest (cm) 76-79 80-83 84-87 88-91 92-95 96-99 100-103 104-107 108-113    114-118 119-123
     
    BOTTOMS (SHORTS, PANTS)
     Size 3XS 2XS XS S M L XL 2XL 3XL
    Hips (cm) 81-85 86-90 91-96 97-102 103-108 109-114  115-120 121-128 129-136


    BRA
    Size 70A 70B 70C 70D 75A 75B 75C 75D 75E 80A 80B 80C 80D 80E 85B 85C 85D 85E
    Chest size (cm) 80-86 80-86 80-86 80-86 86-92 86-92 86-92 86-92 86-92 92-100 92-100 92-100 92-100 92-100 100-106 100-106 100-106 100-106


    SWIMWEAR
    Size XS S M M-L L L-XL XL XL-2XL 2XL
    Hips (cm) 90-93 94-97 98-101 102-105 106-109 110-113 114-119 120-125 126-131


    KIDS SIZE GUIDE


    How to measure:

    • Clothing size: Stand upright and place your bare heels flush against a wall. Measure the distance between the bottom of your foot and the top of your head.
    • Head size: Wrap a tape measure horizontally around your head just above your eyebrows.
    • Hand size: Wrap a tape measure horizontally around your hand, starting from your thumb.
    • Shoe size: Place your heels flush against a wall. Place a heavy object (such as a book) against your toes. Measure the distance between the wall and the object.


      APPAREL
      Age 3 Months 6-9 Months 9-12 Months 18 Months 2 Years 3 Years 4 Years 5 Years 6 Years 8 Years 10 Years 12 Years 14 Years
      Height (cm) 56-63 64-70 71-76 77-82 83-89 90-97 98-104 105-114 115-124 125-132 133-142 143-152 153-162


      SHOES SIZE GUIDE

      MEN SHOES
      US Size 6.5 7 7.5 7.5 8 8.5 9 9.5 9.5 10 10.5 11 11.5 11.5 12 12.5 13
      EU Size 39 39.5 40 40.5 41 41.5 42 42.5 43 43.5 44 44.5 45 45.5 46 46.5 47
      Foot Length (in) 1/2 3/4 10 10 10 1/4 10 1/2 10 1/2 10 1/2 10 3/4 10 3/4 11 11 1/4 11 1/4 11 1/2 11 1/2 11 1/2 11 3/4


      WOMEN SHOES
      US Size 4 4.5 5 5.5 5.5 6 6.5 7 7.5 7.5 8 8.5 9 9 9.5 10 10.5
      EU Size 34 34.5 35 35.5 36 36.5 37 37.5 38 38.5 39 39.5 40 40.5 41 41.5 42
      Foot Length (in) 1/2 1/2 1/2 3/4 3/4 9 1/4 1/4 1/2 1/2 1/2 3/4 10 10 10 1/4 10 1/2 10 1/2


      KIDS SHOES
      US Size 4.5C 5C 5.5C 6C 7C 7.5C 8.5C 9C 10C 11.5C 12.5C 13C 1 2 2.5 3.5 4 5
      EU Size 20 21 22 23 24 25 26 27 28 29 30 31 32 33 34 35 36 37
      Foot Length (in) 3/4 5 1/4 1/2 3/4 6 1/4 1/2 3/4 7 1/4 1/2 3/4 8 1/4 1/2 3/4 1/4


      GEAR SIZE GUIDE

      KIDS BIKES
      Bike size 12" 14" 16" 20" 24"
      Kids height (cm) 75-​90 90-​105 105-120 120-135 135-155
      kids height (ft) 2'5'' - 3' 3' - 3'5'' 3'5'' - 3'11'' 3'11''- 4'5'' 4'5'' - 5'1''


      ROAD BIKES
      Bike size 48 (XS) 51 (S) 54 (M) 57 (L) 60 (XL)
      Your height (cm) 135-150 150-165 165-176 176-184 184-195


      MOUNTAIN BIKES
      Bike size XS S M L XL
      Your height (cm) 135-150 150-165 165-176 176-184 184-195


      SKIS
      Ski size 115-130 125-140 130-145 135-150 135-155 145-165 150-170 155-175 160-180 165-185 170-190 175-195 180-200
      Your height (cm) 132 137 142 147 152 158 163 168 173 178 183 188 193


      SNOWBOARDS
      Snowboard size 128-136 133-141 139-147 144-152 149-157 154-162 159-167 160+ 160+ 160+
      Your height (cm) 147 152 158 163 168 173 178 183 188 193
      Your weight (lb) 50-55 55-60 60-65 65-70 70-75 75-80 80-85 85-90 90-95 95-100


      ACCESSORIES SIZE GUIDE

      KIDS GLOVES
      Glove size 4 Years 6 Years 8 Years 10 Years 12 Years 14 Years
      Hand size (cm) 13.9-14.9 14.9-15.9 15.9-16.9 16.9-17.8 17.8-18.6 18.6-19.5


      ADULT GLOVE
      Glove size XS S M L XL 2XL 3XL
      Hand size (cm) 20.3-20.8 20.9-21.4 21.5-22.1 22.2-22.7 22.8-23.4 23.5-24 24.1-24.7


      BOXING GLOVES
      Glove size 6oz 8oz 10oz 12oz 14oz
      Your weight (lb) 77-99 99-143 143-172 172-198 >198
      Color : Unique
      Size: Unique size
      Ref: 8562489
      In stock

      Product description

      This self-adhesive patch kit lets you easily and quickly repair punctures so you can carry on enjoying your bike rides.

      8 self-adhesive patches for repairing punctures without vulcanising solution.

      Compatibility

      100% effective on all types of Butyl inner tubes.

      Ease of use

      Less restrictive and just as effective as a classic patch.

      Easy assembly / dismantling

      Easy to stick on and quick to use.

      Description

      This self-adhesive patch kit lets you easily and quickly repair punctures so you can carry on enjoying your bike rides.
      User tip:

      1. Remove the inner tube and locate the puncture 2. Roughen the area around the puncture using the sandpaper 3. Clean and dry this area 4. Apply the self-adhesive patch and press hard on the entire area for around 45 seconds 5. Run your nail over the patch to increase its adhesive power 6. Put the inner tube back in the tyre and the tyre in the rim 7. Inflate your tyre to the recommended pressure.

      Storage:

      Optimal lifespan:3 years at room temperature (16-22°C, 30-70% humidity), away from direct light, in original packaging. Minimum temperature for repairs: +10°C Temperature for use: -40°C to +65°C

      Applying the patch:

      Be careful not to touch the sticky part when positioning the patch, so as not to reduce its sticking power. Remove any air bubbles from the centre of the patch towards the edges. Rub the patch with your nail to warm it up and help it stick better. Finally, press firmly with your thumb, covering the entire patch for 45 seconds to 1 minute (press on a clean, flat surface for greater effectiveness).

      Sanding:

      A good sanding of the area concerned will give you a better result. The aim is to obtain a flat, clean surface so the patch holds as well as possible.If the puncture is close to excess material, sand until the excess is removed. Sanding will create micro-scratches that will allow the glue on your patch to set more easily. This stage is very important for a lasting repair.

      Cleaning:

      Clean away any impurities to ensure a clean, flat and dry area to apply the patch. Remember: don't use water or any other product to clean your inner tube after sanding. It's essential to have a clean, dry surface to ensure that your patch lasts.

      Did you know?

      To make sure that your patch remains in place for as long as possible on your repaired inner tube, we strongly recommend that you reinflate your inner tube within 24 hours of applying the patch and that you inflate it to the recommended pressure.

      8 self-adhesive patches for repairing punctures without vulcanising solution.

      Compatibility

      100% effective on all types of Butyl inner tubes.

      Ease of use

      Less restrictive and just as effective as a classic patch.

      Easy assembly / dismantling

      Easy to stick on and quick to use.

      This self-adhesive patch kit lets you easily and quickly repair punctures so you can carry on enjoying your bike rides.

      This self-adhesive patch kit lets you easily and quickly repair punctures so you can carry on enjoying your bike rides.

      User tip:

      1. Remove the inner tube and locate the puncture 2. Roughen the area around the puncture using the sandpaper 3. Clean and dry this area 4. Apply the self-adhesive patch and press hard on the entire area for around 45 seconds 5. Run your nail over the patch to increase its adhesive power 6. Put the inner tube back in the tyre and the tyre in the rim 7. Inflate your tyre to the recommended pressure.

      Storage:

      Optimal lifespan:3 years at room temperature (16-22°C, 30-70% humidity), away from direct light, in original packaging. Minimum temperature for repairs: +10°C Temperature for use: -40°C to +65°C

      Applying the patch:

      Be careful not to touch the sticky part when positioning the patch, so as not to reduce its sticking power. Remove any air bubbles from the centre of the patch towards the edges. Rub the patch with your nail to warm it up and help it stick better. Finally, press firmly with your thumb, covering the entire patch for 45 seconds to 1 minute (press on a clean, flat surface for greater effectiveness).

      Sanding:

      A good sanding of the area concerned will give you a better result. The aim is to obtain a flat, clean surface so the patch holds as well as possible.If the puncture is close to excess material, sand until the excess is removed. Sanding will create micro-scratches that will allow the glue on your patch to set more easily. This stage is very important for a lasting repair.

      Cleaning:

      Clean away any impurities to ensure a clean, flat and dry area to apply the patch. Remember: don't use water or any other product to clean your inner tube after sanding. It's essential to have a clean, dry surface to ensure that your patch lasts.

      Did you know?

      To make sure that your patch remains in place for as long as possible on your repaired inner tube, we strongly recommend that you reinflate your inner tube within 24 hours of applying the patch and that you inflate it to the recommended pressure.

      8 self-adhesive patches for repairing punctures without vulcanising solution.

      Compatibility

      100% effective on all types of Butyl inner tubes.

      Ease of use

      Less restrictive and just as effective as a classic patch.

      Easy assembly / dismantling

      Easy to stick on and quick to use.

      This self-adhesive patch kit lets you easily and quickly repair punctures so you can carry on enjoying your bike rides.

      Carte fidélité

      Please log in to view your member card.

      Carte fidélité

      Please log in to view your member card.